B: General administration tasks
AppFabric Cache
Installing AppFabric
NOTE: There are specific configurations required in AppFabric for Content Manager and SharePoint integration. If AppFabric is already installed, go to Configuring AppFabric.
The Microsoft AppFabric framework must be installed on Content Manager Workgroup Servers, where the integration is installed (Content Manager Farm). This is used to provide configuration caching across multiple servers.
-
Download AppFabric 1.1 directly from Microsoft:
http://www.microsoft.com/en-au/download/details.aspx?id=27115
NOTE: Download and install the x64 version of AppFabric 1.1.
-
Run the installer as Administrator. You can accept all the install wizard defaults, until you reach the Features page.
-
Select all of the options.
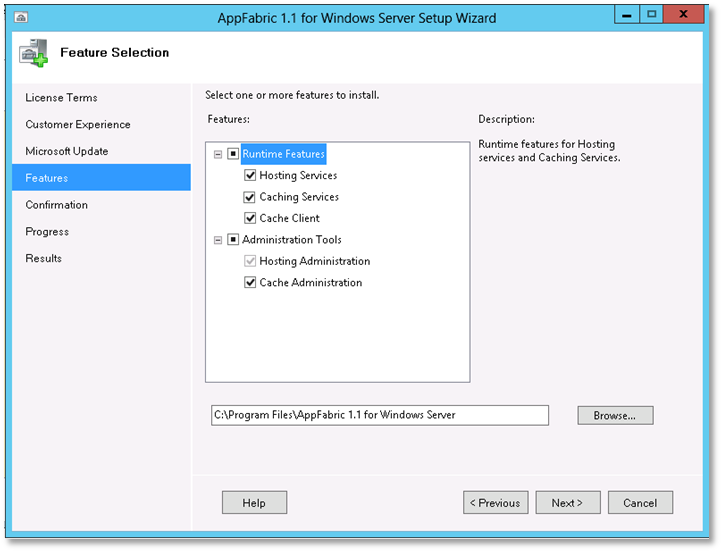
Complete the rest of the wizard with default settings to install AppFabric.
Configuring AppFabric
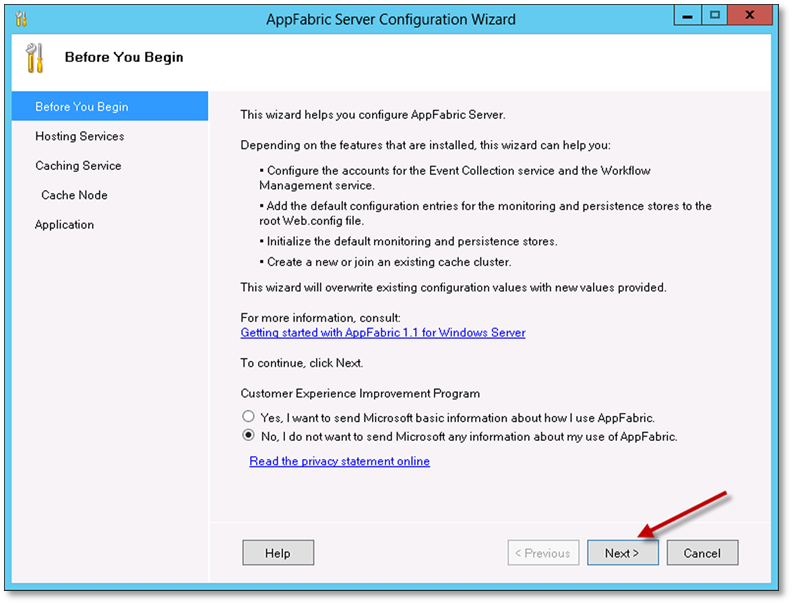
The configuration wizard usually starts automatically after installation.
-
If already started, go to next step. If it fails to start, launch it manually from the Start menu, right-click Configure App Fabric and click Run as administrator.
-
On the initial page, accept the wizard defaults and click Next.
-
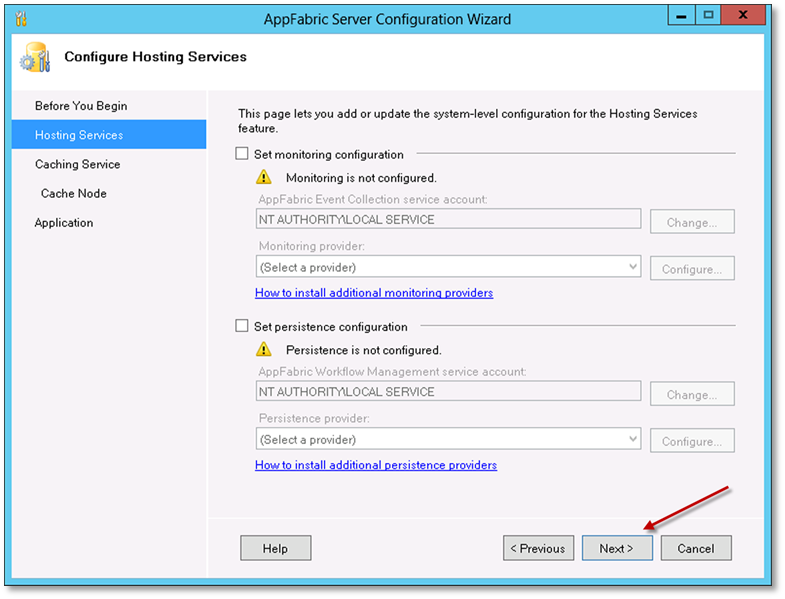
On the Hosting Services page, accept the defaults and click Next.
-
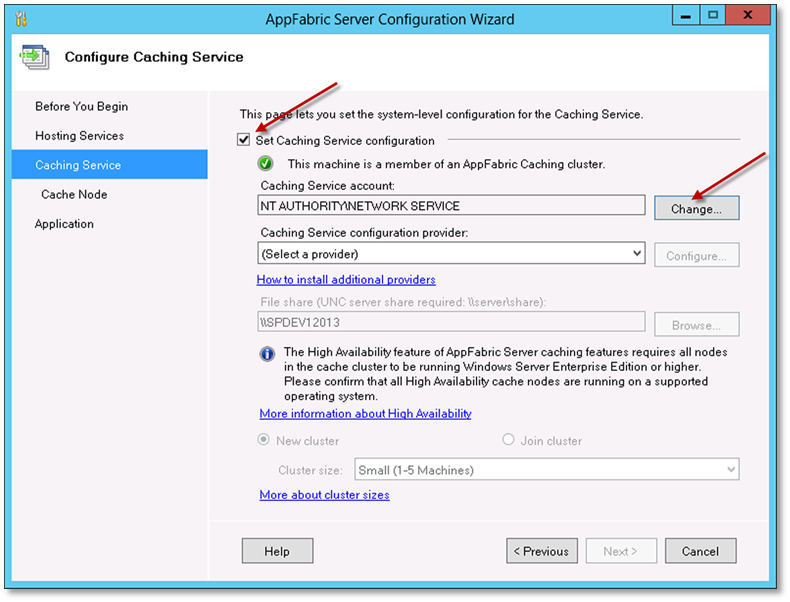
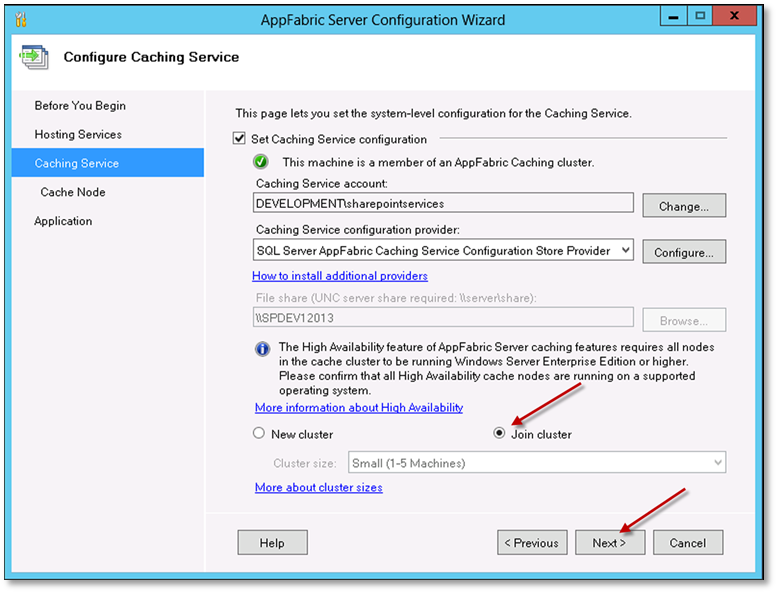
On the Caching Services page, select the Set Caching Service configuration checkbox and click the Change.
-
On the select user dialog, choose the Custom account option. Nominate a domain account for the AppFabric Caching Service, enter the relevant password and click OK.

-
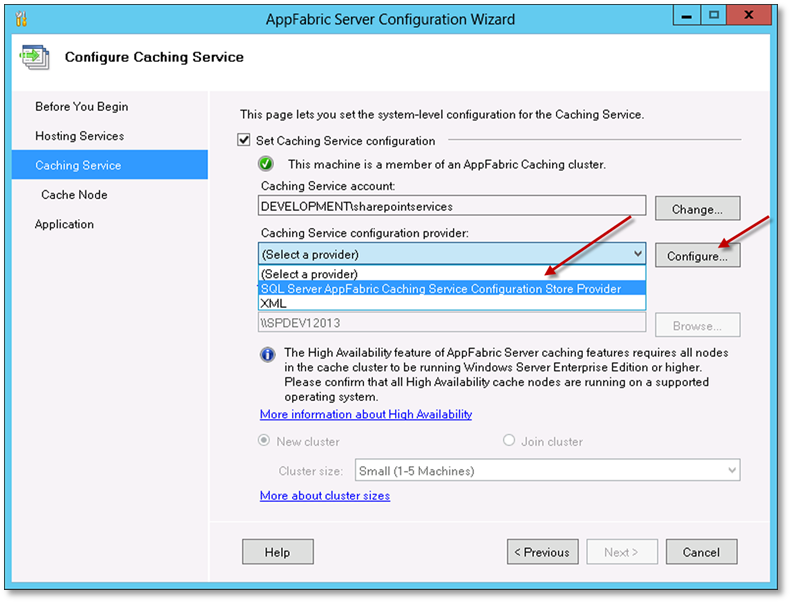
Select a caching service configuration provider. Click on the (Select a provider) drop down, select SQL Server AppFabric Caching Service Configuration Store Provider, and click Configure.
-
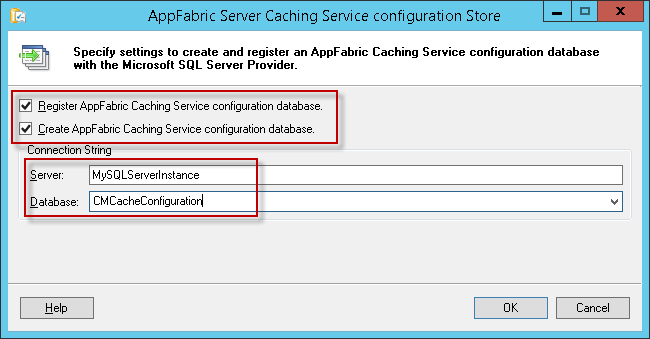
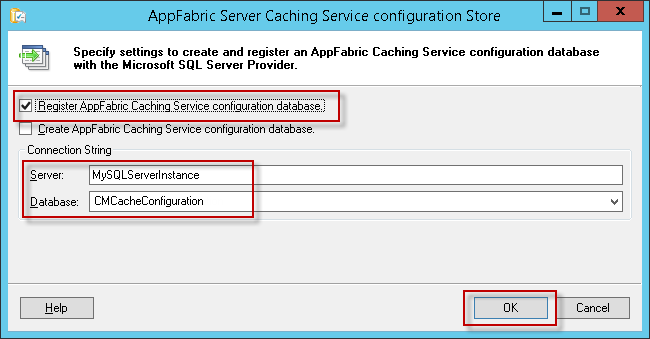
On the AppFabric Server Caching Service Configuration Store dialog, select checkboxes for both:
- Register AppFabric Caching Service configuration database
- Create AppFabric Caching Service configuration database
Fill in your SQL Server name and provide a name for the caching configuration store database. The example given is ‘CMCacheConfiguration’, but you can use any name you deem appropriate. This will create a new database in SQL Server. Click OK.
-
Click Yes in the following prompt.
-
Click OK in the confirmation dialog.
-
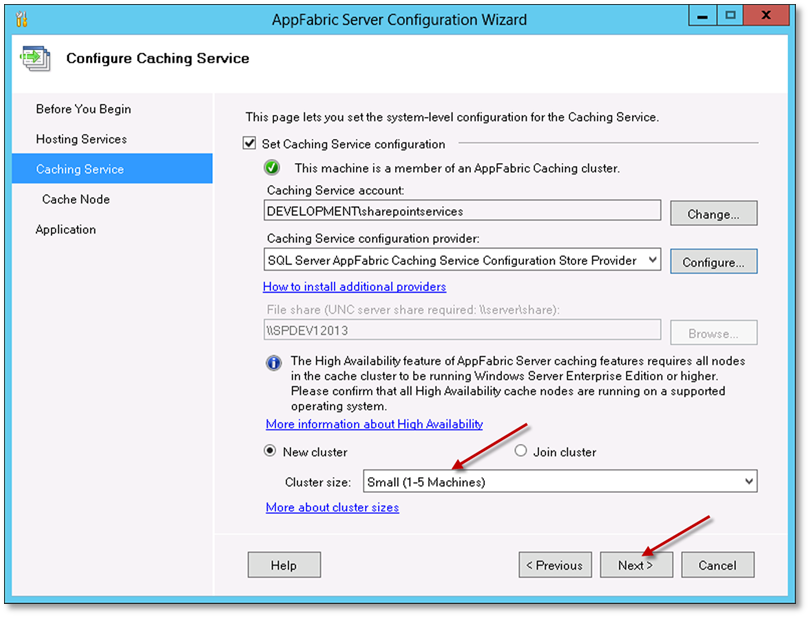
Select the option New cluster and the cluster size (The cluster size depends on the number of Content Manager Workgroup Servers in your farm). Choose the appropriate option to match the number of servers. Click Next.
-
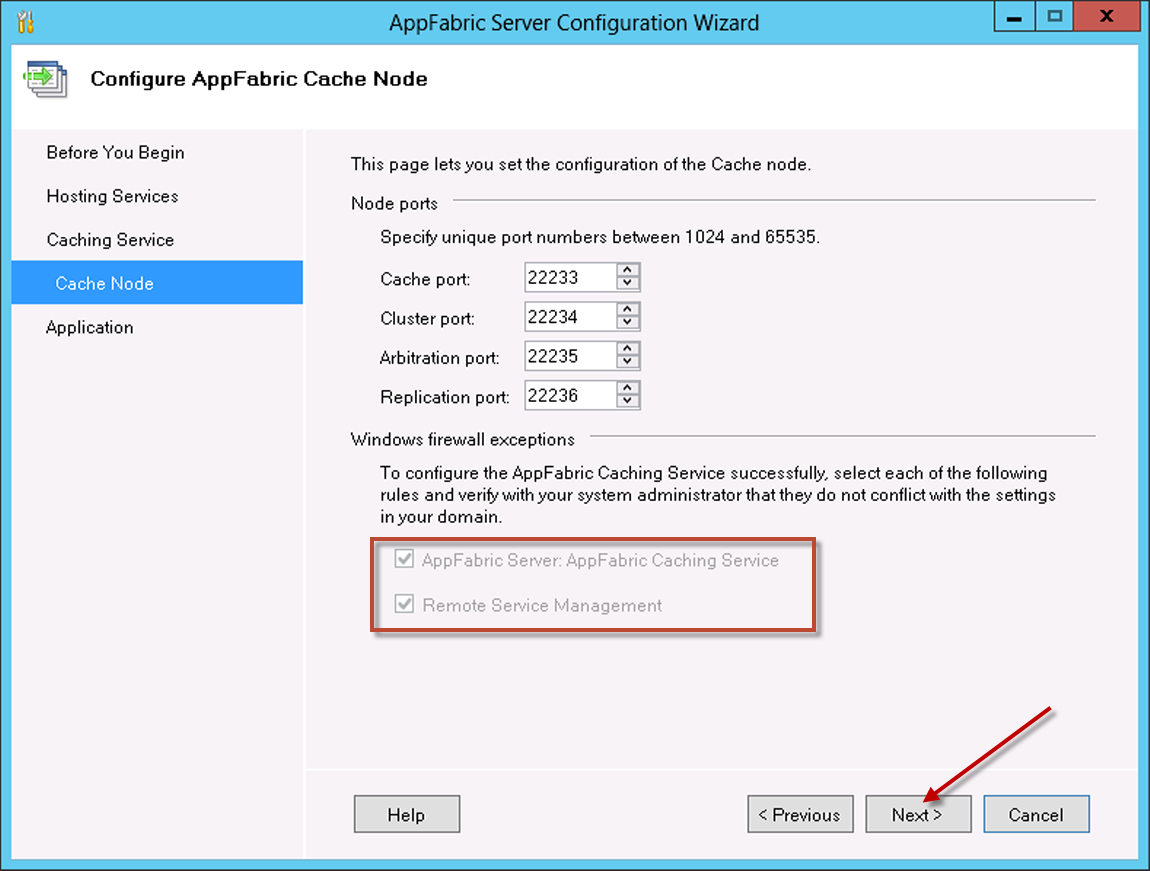
On the Configure AppFabric Cache Node page, if you have Windows Firewall enabled, select both checkboxes:
- AppFabric Server AppFabric Caching Service
- Remote Service Management
For other firewalls, you need to configure them manually to allow these ports, to enable communication between the SharePoint farm and Content Manager Servers. You will see a warning message, if the Windows Firewall is not enabled, click Next.
-
Click Yes in the configuration settings prompt.
-
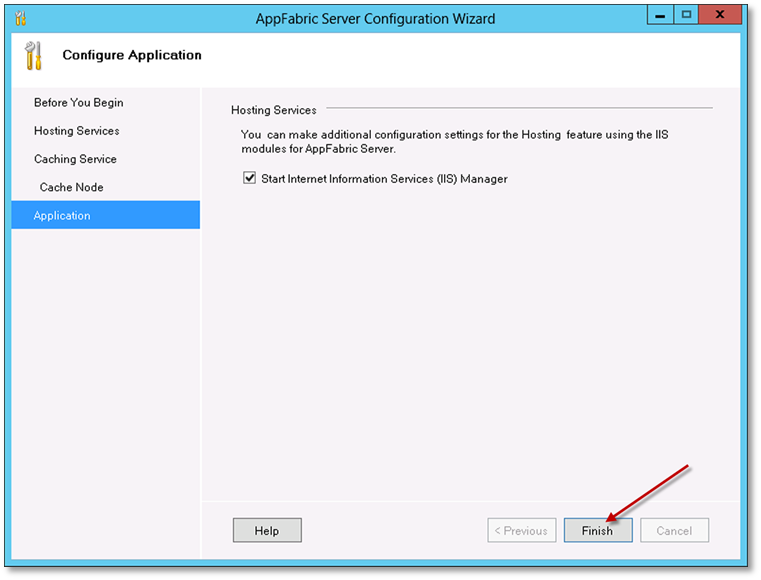
A progress bar is displayed while the configuration settings are applied. Once this has completed, on the Application page, click Finish.
Joining a server to an existing cache cluster
-
Follow steps 1-6 from the Configuring AppFabric section.
-
On the AppFabric Server Caching Service Configuration Store dialog:
-
Select the checkbox for Register AppFabric Caching Service configuration database.
-
Leave the Create AppFabric Caching Service configuration database option unselected. Fill in your SQL Server name and select the database you created during initial configuration.
-
Click OK.
-
-
Click Yes in the following prompt.
-
Click OK in the confirmation dialog.
-
Select Join cluster option and Click Next.
-
On the Cache Node page, click Next.
-
Click Yes on the configuration settings prompt.
-
A progress bar is displayed while the configuration settings are applied. Once this has completed, on the Application page, click Finish.
If AppFabric is already installed, an entry is made in the Programs and Features.
For troubleshooting issues with AppFabric, see the Troubleshooting AppFabric appendix.
Azure cache
The Azure cache capability is very much in flux at the moment, this section is up-to-date as of the publication date, but bear in mind that the cache creation process may change in the future.
NOTE: The managed cache PowerShell commands were added late May 2014, so if you already have Azure PowerShell installed and configured, make sure you update to the latest version.
There are two types of Azure caches that can be used:
- Managed
- Redis
The Redis cache is Microsof’s preferred cache to be used although both are still supported.
Managed cache
Creating an Azure Managed Cache requires the use of Azure PowerShell. This is installed and configured on a local machine, and can be used to remotely administer/configure Azure.
-
To install Windows Azure PowerShell, go to http://azure.microsoft.com/en-us/downloads/ and under the Windows PowerShell section, click on Install.
-
Once installed, run Windows Azure PowerShell and connect to your subscription. This is beyond the scope of this document, but this article describes the process of installation and configuration:
http://azure.microsoft.com/en-us/documentation/articles/install-configure-powershell/
To create an Azure cache for use by the integration, follow these steps:
-
Start Windows Azure PowerShell and connect to the appropriate subscription.
-
Run the following commands
NOTE: Change the location to match your Azure VMs region.
New-AzureManagedCache -Name cmcache -Location "East Asia" -Sku Basic -Memory 128MB
Get-AzureManagedCache - This creates a cachenamed ‘
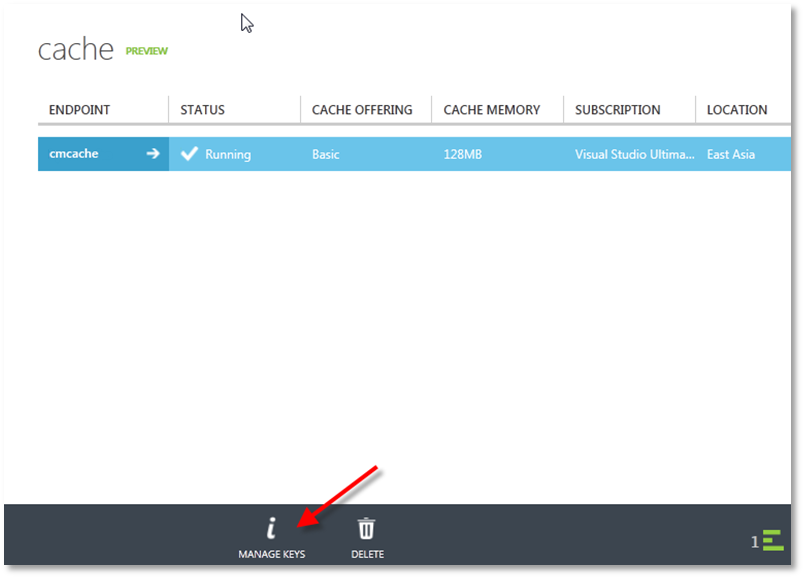
cmcache’, in the region that you define, and once created returns the details of caches in the current subscription. - Once created, the cache can be managed from the Azure Management Portal.
-
Select the cache you just created and click on the MANAGE KEYS option in the bottom toolbar.
-
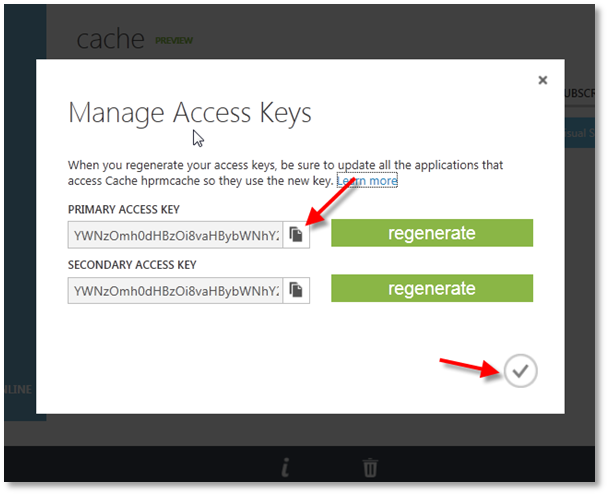
On the Manage Access Keys dialog, Click Copy to Clipboard next to the PRIMARY ACCESS KEY.
-
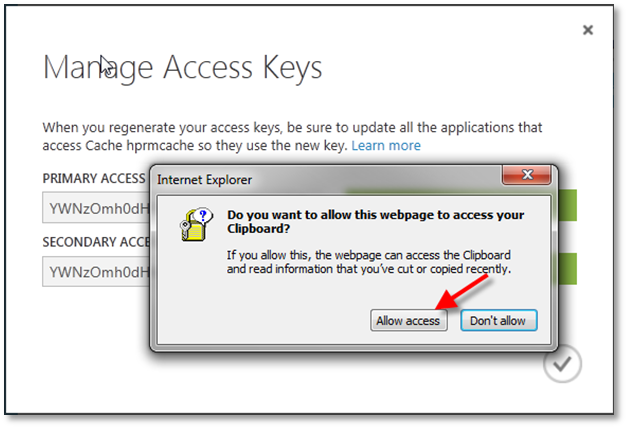
On the clipboard prompt, click Allow access.
Redis cache
To create an Azure Redis cache, navigate to the Azure portal. At the time of writing, you must use the preview version of the portal to perform this task (https://portal.azure.com)
-
Log in to Azure portal and select Create a resource.
-
On the new page, select Databases and then select Azure Cache for Redis.
-
Complete the requested details to create the cache.
Obtaining endpoint and access keys
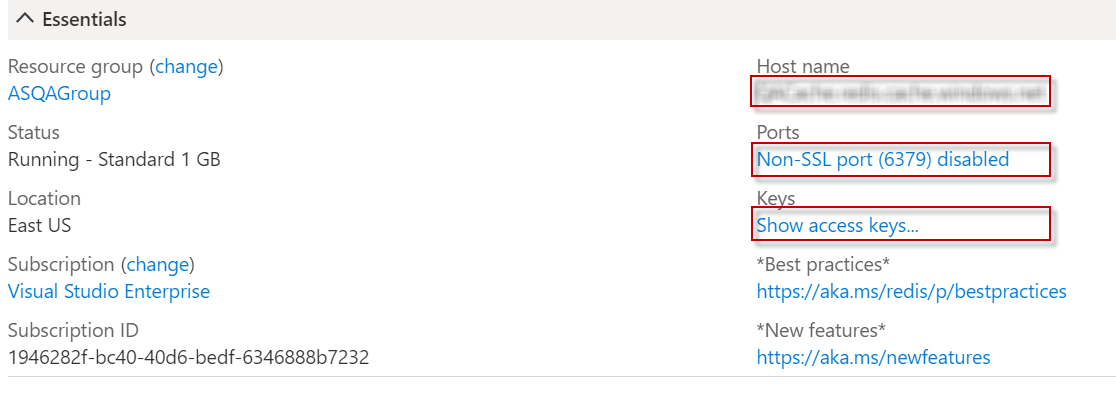
Log in to Azure portal and navigate to All Resources > Redis cache > Overview page.
-
Endpoint: The Host name is the Azure cache endpoint. Select and copy the value.
-
Primary access key: Click the Show access keys link to reveal the keys in use.
-
Configured to use SSL: To determine if Redis cache is configured to use SSL, under the Ports section the value of Allow access only via SSL will indicate if the cache is configured to only us SSL.
HTTPS
Enabling HTTPS for a site
To enable HTTPS for the Content Manager SharePoint Server website, you will first need to have obtained an SSL certificate, or use an existing SSL certificate for your internal domain. There are a number of options to obtain a certificate, the process of obtaining the certificate is beyond the scope of this document, and there are lots of publicly available articles from Microsoft detailing the process:
|
Certificate Type |
Notes |
Suitable For |
|
Commercial SSL Certificate |
Obtained from a commercial SSL vendor such as GoDaddy, Thawte, Verisign, Digicert etc. These have an annual cost associated, but ARE required to secure communication with SharePoint Online environments |
On premise, and SharePoint Online |
|
Domain Certificate |
Issued from an internal Active Directory Certification Authority, these can be used (at no cost) to secure internal sites on premise |
On premise only |
|
Self-signed Certificate |
Created within IIS, can be used in some scenarios (SharePoint High-Trust) for testing/development |
Not suitable |
The following steps assume you have a valid SSL certificate added to IIS Server Certificates, available for use.
-
Open IIS Manager, and navigate to the Content Manager SharePoint Server website.
-
Right click on the site name in the Connections pane, and choose Edit Bindings.
-
On the Site Bindings dialog, click Add.
-
On the Add Site Binding dialog, change the Type to https and then select your certificate in the SSL certificate drop-down. Click OK.
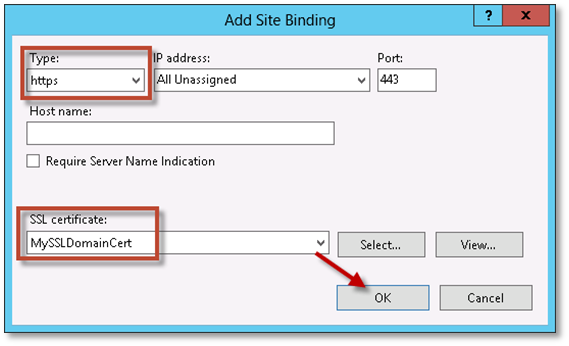
The https entry has been added. Close the Site Bindings dialog.

-
To test, open a browser and navigate to https://<yourURL>/pages/dialogloader.html where yourURL is your load balanced URL, or the name of the Content Manager server, or configured host header. You should see the ‘Working on it’ page, without any certificate errors.
The integration website is now configured to use HTTPS.
Disabling HTTP for a site
To remove the HTTP binding follow these steps:
NOTE: This can sometimes cause problems with an SSL secured integration website.
-
Open IIS Manager, and navigate to the Content Manager SharePoint Server website.
-
Right click on the site name in the Connections pane, and choose Edit Bindings.
-
On the Site Bindings dialog, select the http entry you want to remove and click Remove.
- Click Yes on the confirmation prompt.
-
Confirm the http entry has been removed and click Close on the Site Bindings dialog.
Certificate
Creating a self-signed certificate
This section details the steps to create a self-signed certificate. It is assumed that you have already identified the folder that the certificate should be exported to, that the location has been created and the relevant permissions assigned to it.
-
Open IIS Manager.
-
In IIS Manager, select the server node in the tree view on the left.
-
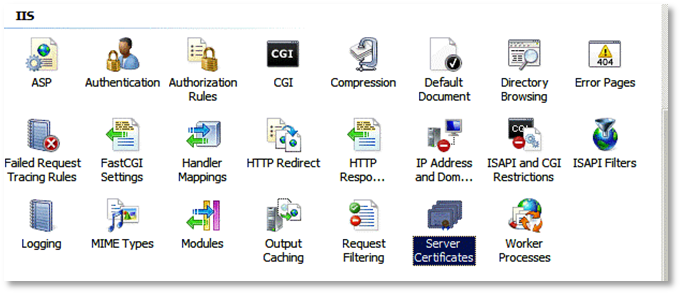
In the pane on the right (with “Features View” selected at the bottom) double click the “Server Certificates” icon.
-
Select the Create Self-Signed Certificate link from the set of links on the right side.

-
Give the certificate a suitable name and choose “Personal” as the certificate store.

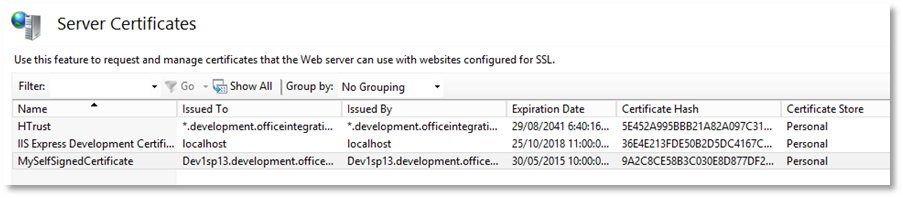
You should now see the certificate in the list of server certificates
-
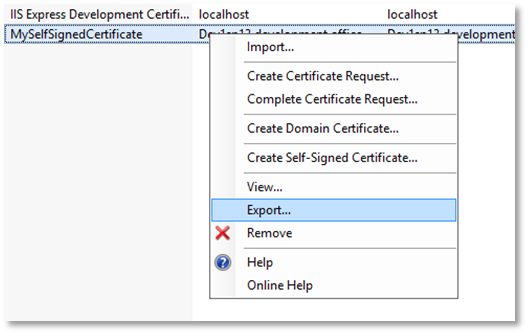
Right-click the certificate in the list, and then select Export.
-
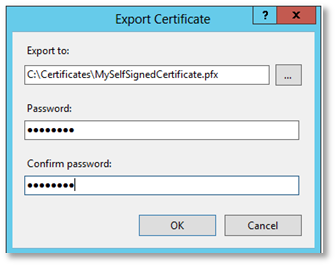
Enter the full path to the file (choosing “.pfx” as the extension) as well as a password for the certificate. Click OK.
The following steps allow the creation of a corresponding “.cer” file for the certificate:
-
In IIS Manager, select the server node in the tree view on the left.
-
In the pane on the right (with “Features View” selected at the bottom) double click the “Server Certificates” icon.
-
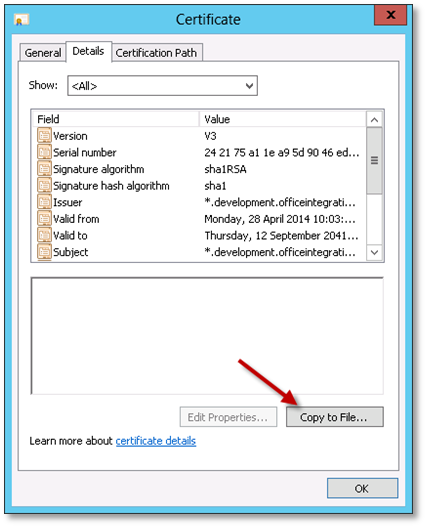
Locate the required certificate in the list, double-click it to show the certificate details, and go to the details tab.
-
Choose “Copy to File” to launch the Certificate Export Wizard.
-
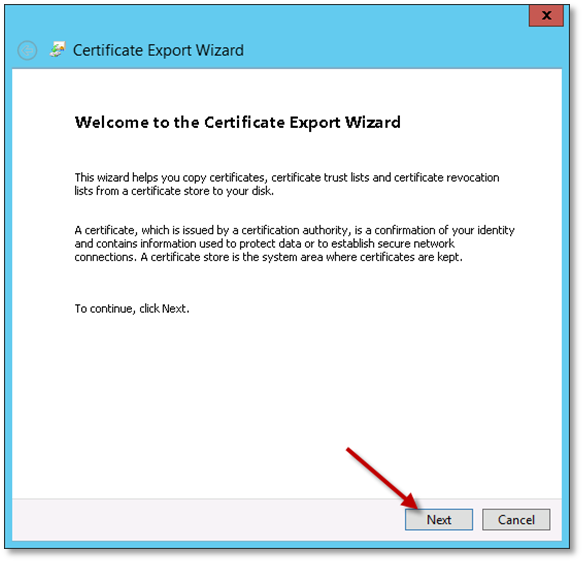
Once the Certificate Export Wizard opens, click Next.
-
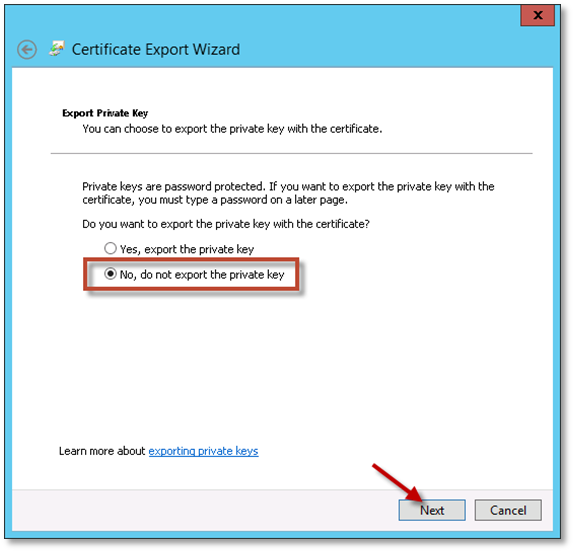
Select “No, do not export the private key” and click Next.
-
Select to export as “DER encode binary X.509”, and click Next.
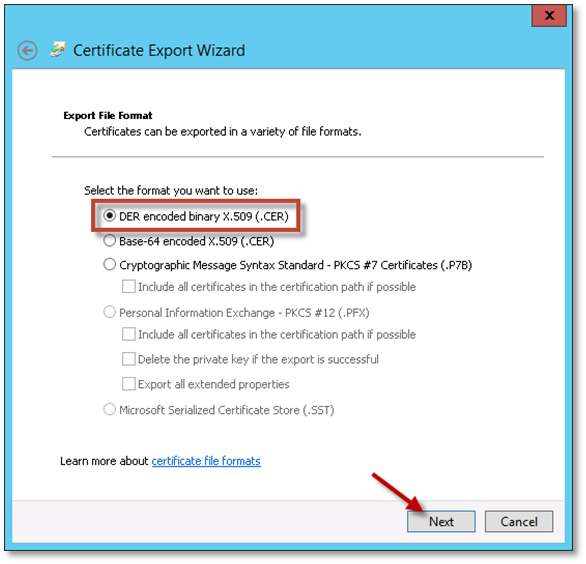
-
Specify the full file path to export the “.cer” file too, and click Next.
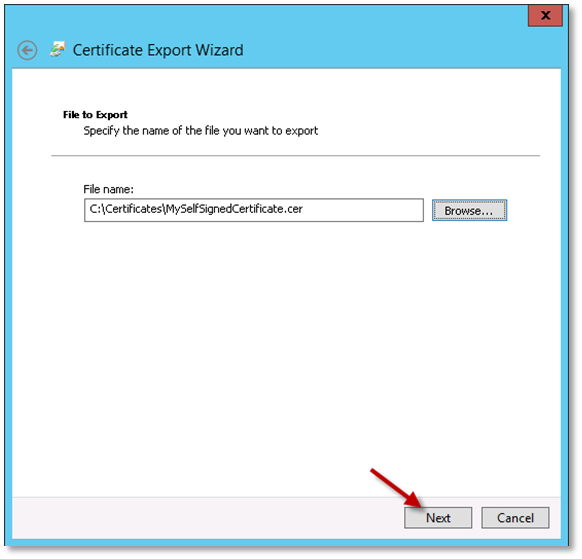
-
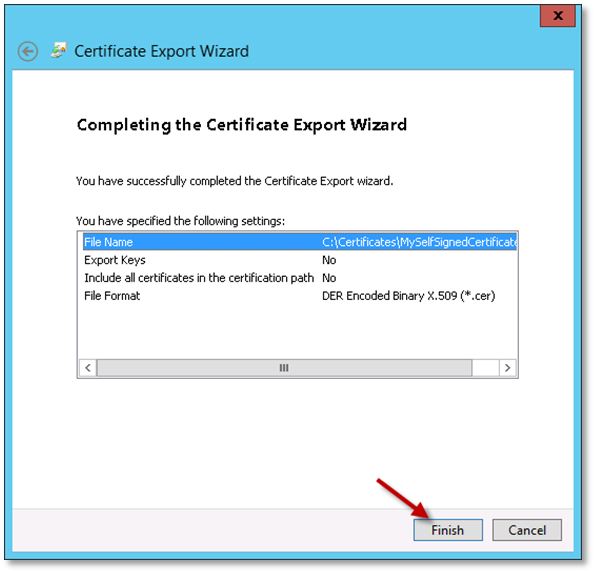
Click Finish on the final page of the wizard.
Using the Certificate MMC snap in
To use the MMC (Microsoft Management Console), follow the steps:
-
Open the Run window (Hit Start, type ‘run’, and launch).
-
In the Run dialog, type in ‘mmc’ and click OK.
-
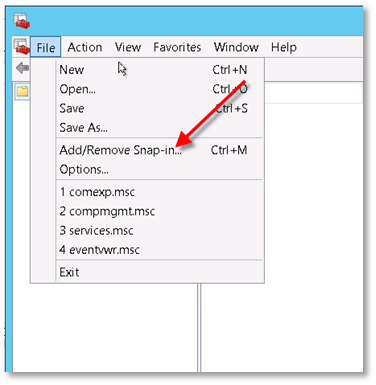
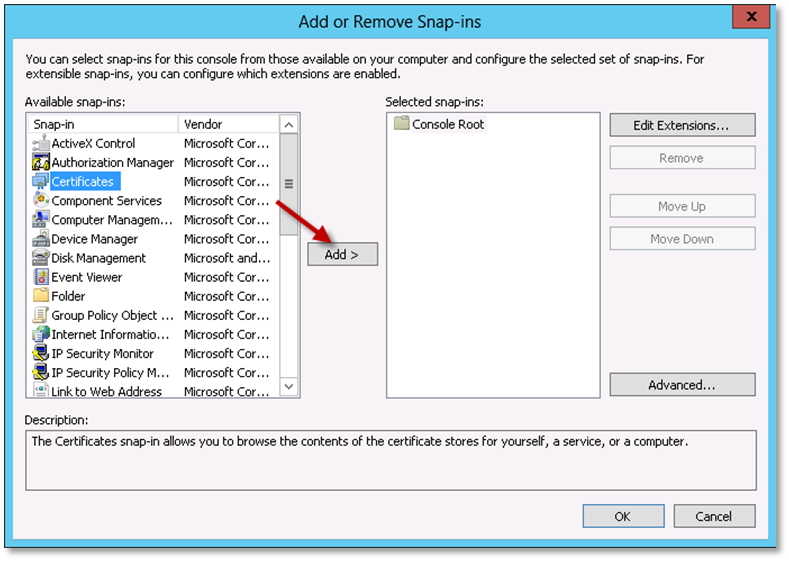
When the console opens, go to the File menu and select Add/Remove Snap-ins.
-
Select Certificates and click Add.
-
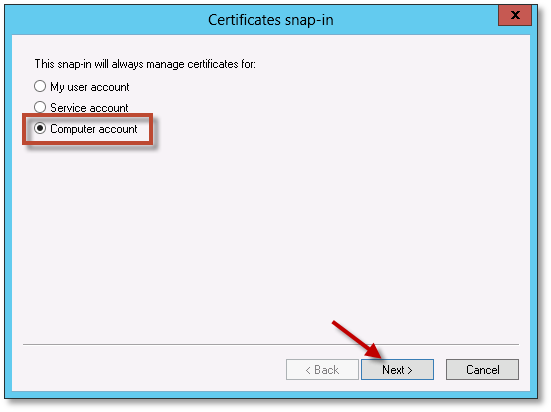
On the Certificates snap-in dialog, select Computer account and click Next.
-
Select Local computer: (the computer this console is running on), and click Finish.

-
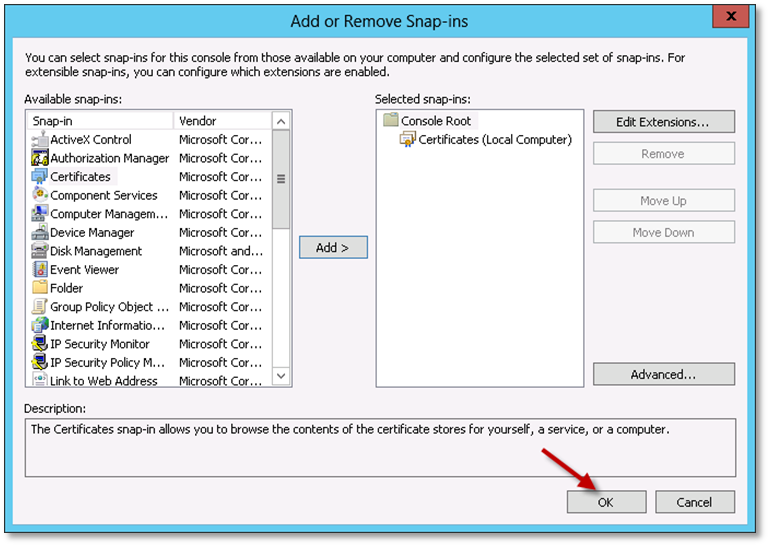
Click OK on the Add or Remove Snap-ins dialog.
Adding a certificate in the Trusted Root Certification Authorities store for a machine
-
Open the machine MMC with the certificate snap in.
-
Expand the Certificates node in the left-hand pane.
-
Expand the Trusted Root Certification Authorities node. Right-click on the Certificates sub-node, and select All Tasks ->Import.
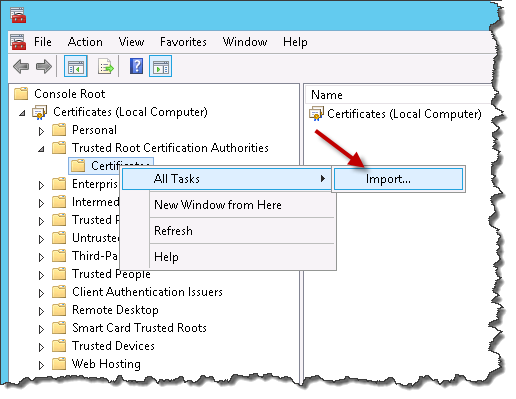
- Choose the “.cer” file to be imported.
- Ensure Place all certificates in the following store is selected and the certificate store is Trusted Root Certification Authorities.
- Click Next.
More details can be found in this article: http://technet.microsoft.com/en-us/library/cc754841.aspx.
Port
Opening a port
To open a port in the Windows Server 2012 Firewall, follow the steps:
-
Go to the Windows Start menu, and type ‘firewall’.
-
Launch the Windows Firewall application.
-
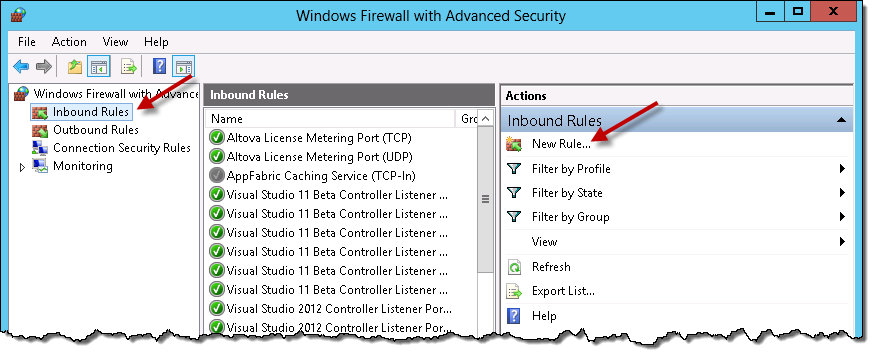
In the left-hand navigation pane, click Inbound Rules. In the Actions pane, click on New Rule.
-
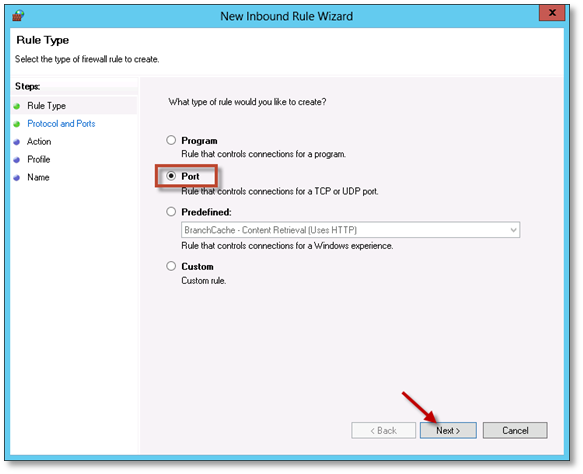
In the New Inbound Rule Wizard, choose Port and click Next.
-
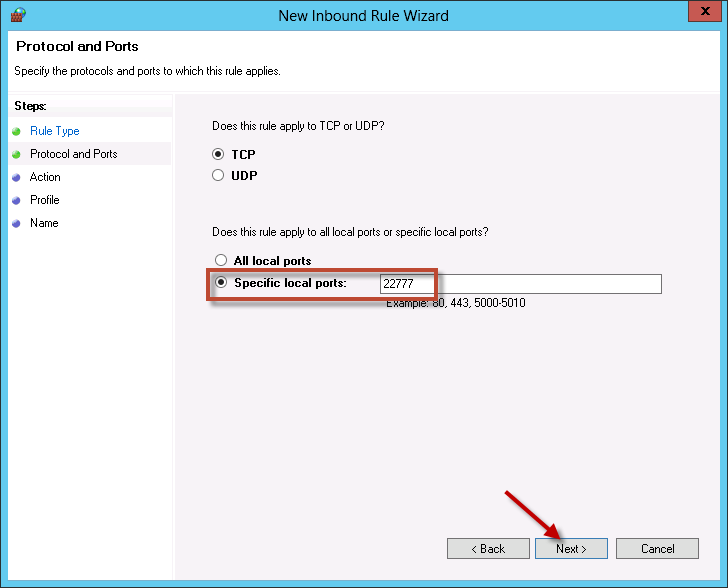
Make sure TCP is selected, and enter the specific port for the integration website. In this example, port 22777 is being opened. Click Next.
-
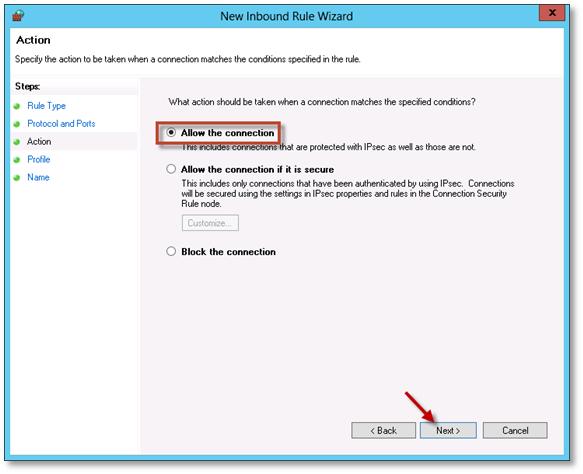
Accept the default option Allow the connection and click Next.
-
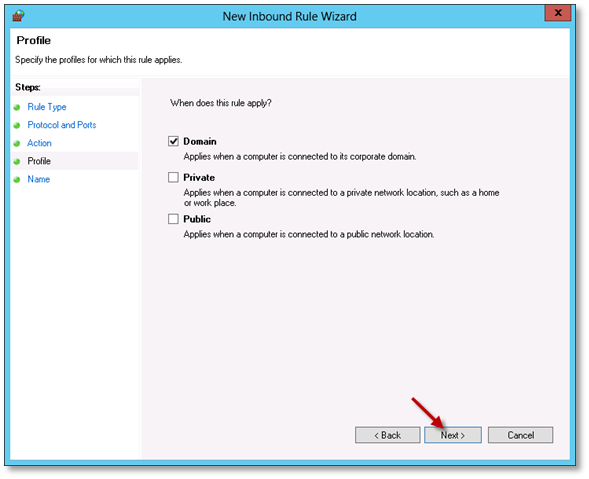
Choose which profile to apply the rule to (You may just want to apply to the Domain profile). Click Next.
-
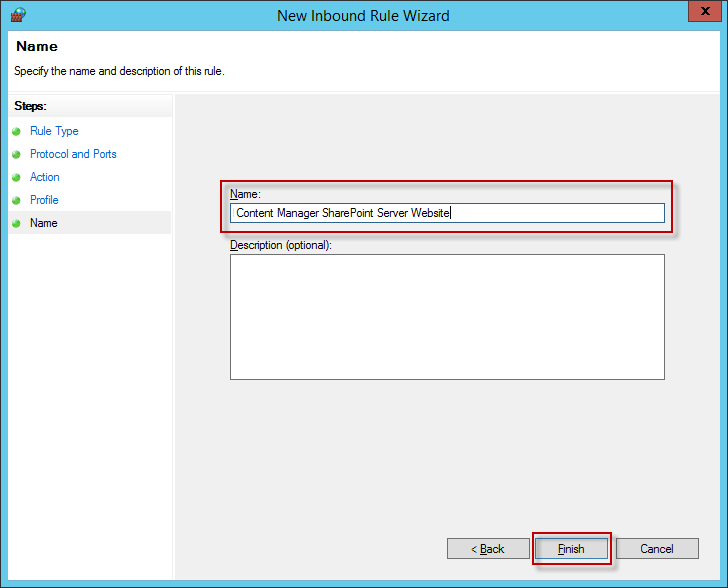
Give the rule a name e.g. ‘Content Manager SharePoint Server website’ and description. Click Finish.
Determining ports in use by IIS
To determine which ports are already in use by existing IIS websites:
-
Open IIS Manager, and in the left-hand Connections pane, select the Sites node.
-
The list of websites, and their associated port bindings will be displayed in the main window.

Alternatively, to display a list of all ports in use (Not just IIS websites), follow these steps:
-
Open a cmd prompt and type
netstat –a -
A list of active ports will be displayed.
Prepare record types
It is necessary to identify and configure the record types that will be used in Content Manager for managing SharePoint content.
Create SharePoint site and list record types
When managing content, a record is created to represent the site that the content resides on. Make sure to create "SharePoint site" and "SharePoint list" record types. Suitable record types must have a behavior in Content Manager. See, Determining the behavior of a record type.
For more information, refer Content Manager documentation to create suitable SharePoint site and SharePoint list record types.
Mark record types as suitable
For a record type to be suitable for use when managing SharePoint content, it must be marked as being suitable. For each record type that is intended to be used to manage SharePoint content, it must be marked as being suitable. To mark the record type as suitable, follow the steps:
-
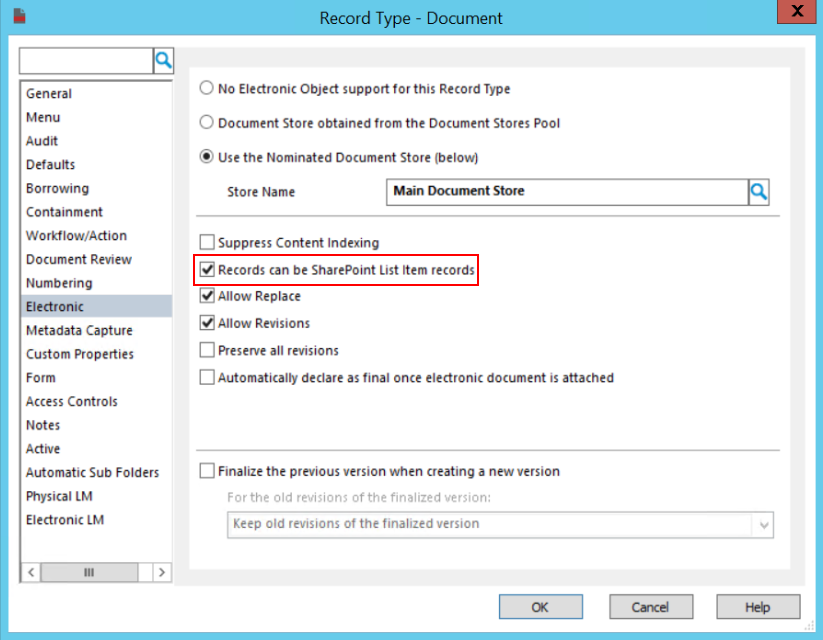
Double-click on the record type and click Electronic tab.
-
Ensure that this record type supports documents.
-
Check the Records can be SharePoint List Item Records check box.
For details on how to access the list of record types, see the appendix Accessing the list of record types.
Ensure suitable numbering patterns
It is important that the numbering pattern you use for your record types will not clash with existing numbering. Therefore, ensure that all record types that will be used for management of SharePoint content have unique numbering patterns and the next number to use is a number that is available.
This applies for record types that will be used to represent:
- List items
- Containers
- SharePoint lists
- SharePoint sites
For information regarding numbering patterns, see the Content Manager product documentation.
Accessing the list of record types
To access the list of Record Types:
-
Open Content Manager, opening the relevant dataset.
-
From the Records section of the Tools ribbon, click on Record Types.
-
A list of Record Types in the current dataset will be displayed.
Determining the behavior of a record type
To confirm the behavior for a given Record Type:
-
Open Content Manager, opening the relevant dataset.
-
From the Records section of the Tools ribbon, click on Record Types.
-
Double-click an existing record type in the list to open up the properties page, or right-click in white space and choose New Record Type to create a new one.
-
On the General tab you can see the existing Behavior in the drop-down. Change this to the desired behavior and click OK to save.
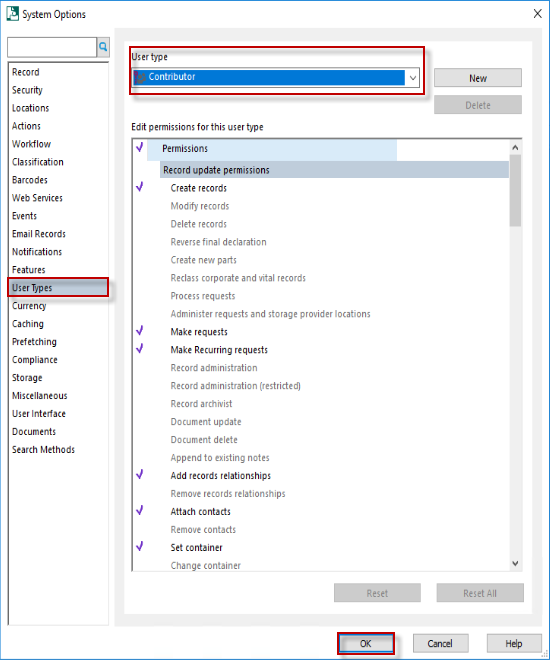
Setting the permissions granted to a user type
It is possible to modify the permissions that are granted by default to a user type in Content Manager. From the Administration tab, select the System button.
Select the User Types tab. Select the User Type to be modified then add or remove the permissions to build the required default permission set for that type of user. Click OK to save these settings.